Category: Recipes

Top 5 Dinner Recipes on Repeat for 2020

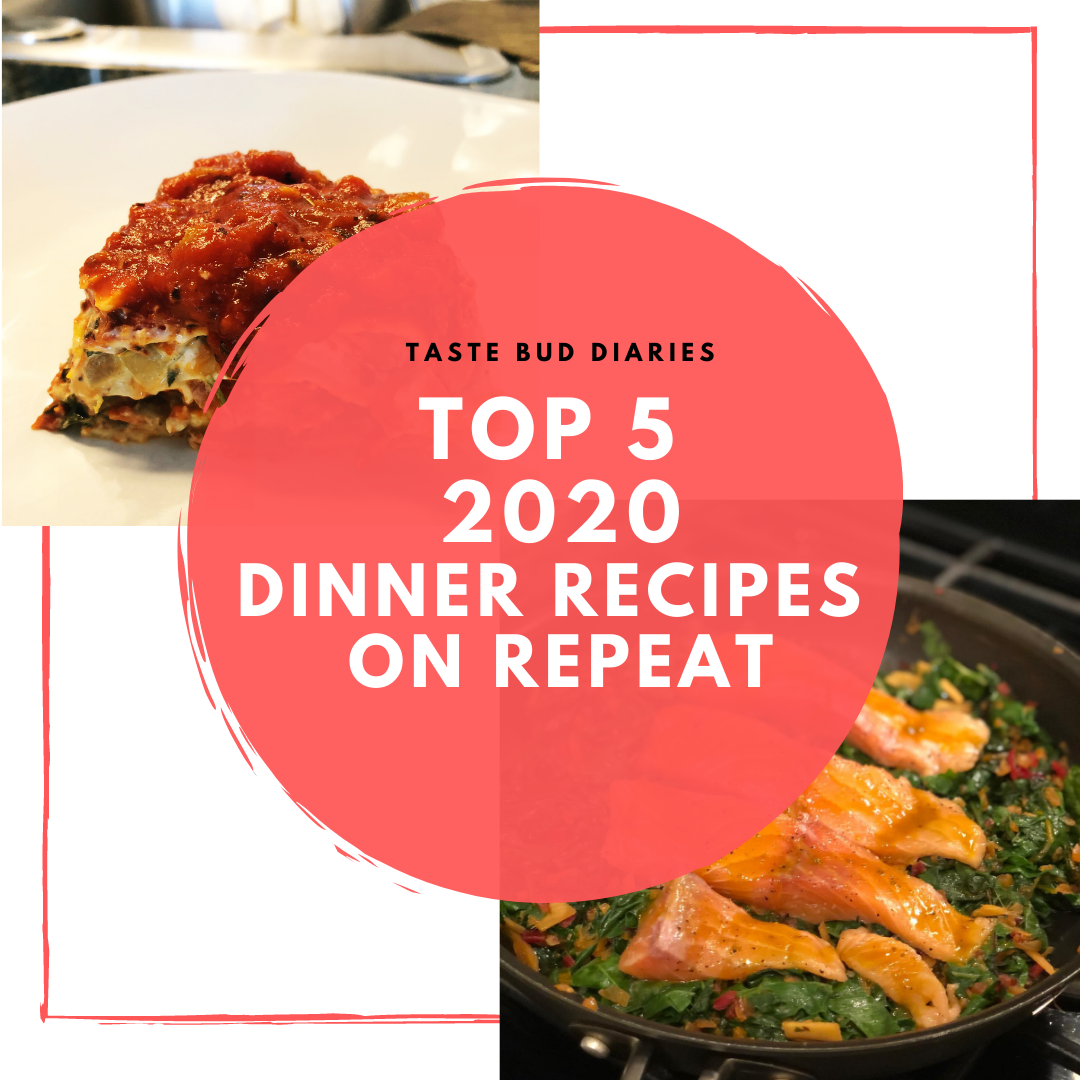
2020 has pushed us to cook & plan more meals than ever before.  Here I have compiled a list of my Top 5 dinner recipes on repeat for 2020.  These are on “the rotation” – tried and true, easy-to-make and delicious recipes from some of my favorite food blogs and websites. Hope this gives you a little inspiration if you are looking for something good to cook!

These recipes are listed in no particular order – it all depends on what you are in the mood for. These are ALL 5-Star recipes in my book! If anything catches your eye, try it out and let me know what you think!

BONUS: I’ve also listed a couple of my favorite Spotify playlists at the end that are great background for cooking!

  1. Sheet Pan Chicken Pitas with Tzatziki – Pinch of Yum 

I make this recipe at least once a month – I love the combination of flavors – salty, sweet, acidic and savory. I usually serve these with naan bread that I’ll crisp up on the grill or my air fryer. The secret ingredient is the curry powder- don’t skip it! Also, be sure to make the homemade Tzatziki sauce – all the flavors work together. This is just plain tasty.

2. Crispy Chipotle Chicken Tacos with Cilantro Lime Ranch – Half Baked Harvest

This recipe is fun because you can make crispity-crunchity tacos out of regular corn tortillas by adding a little bit of oil to the tortillas and putting the tacos in the oven. The process of baking them will crisp them up!

One tip that I learned by experience is to be sure to cover the tortilla with a wet paper towel in the microwave so that they don’t break when you put the filling inside and then into the oven. I also make this with ground turkey instead of chicken – I like the ground turkey from Trader Joes (Get the one that has the most fat content for the most flavor). The Cilantro Lime Ranch is delicious and worth making – it makes the dish. 

3. Turmeric Salmon with Coconut Crisp – Bon Appetit

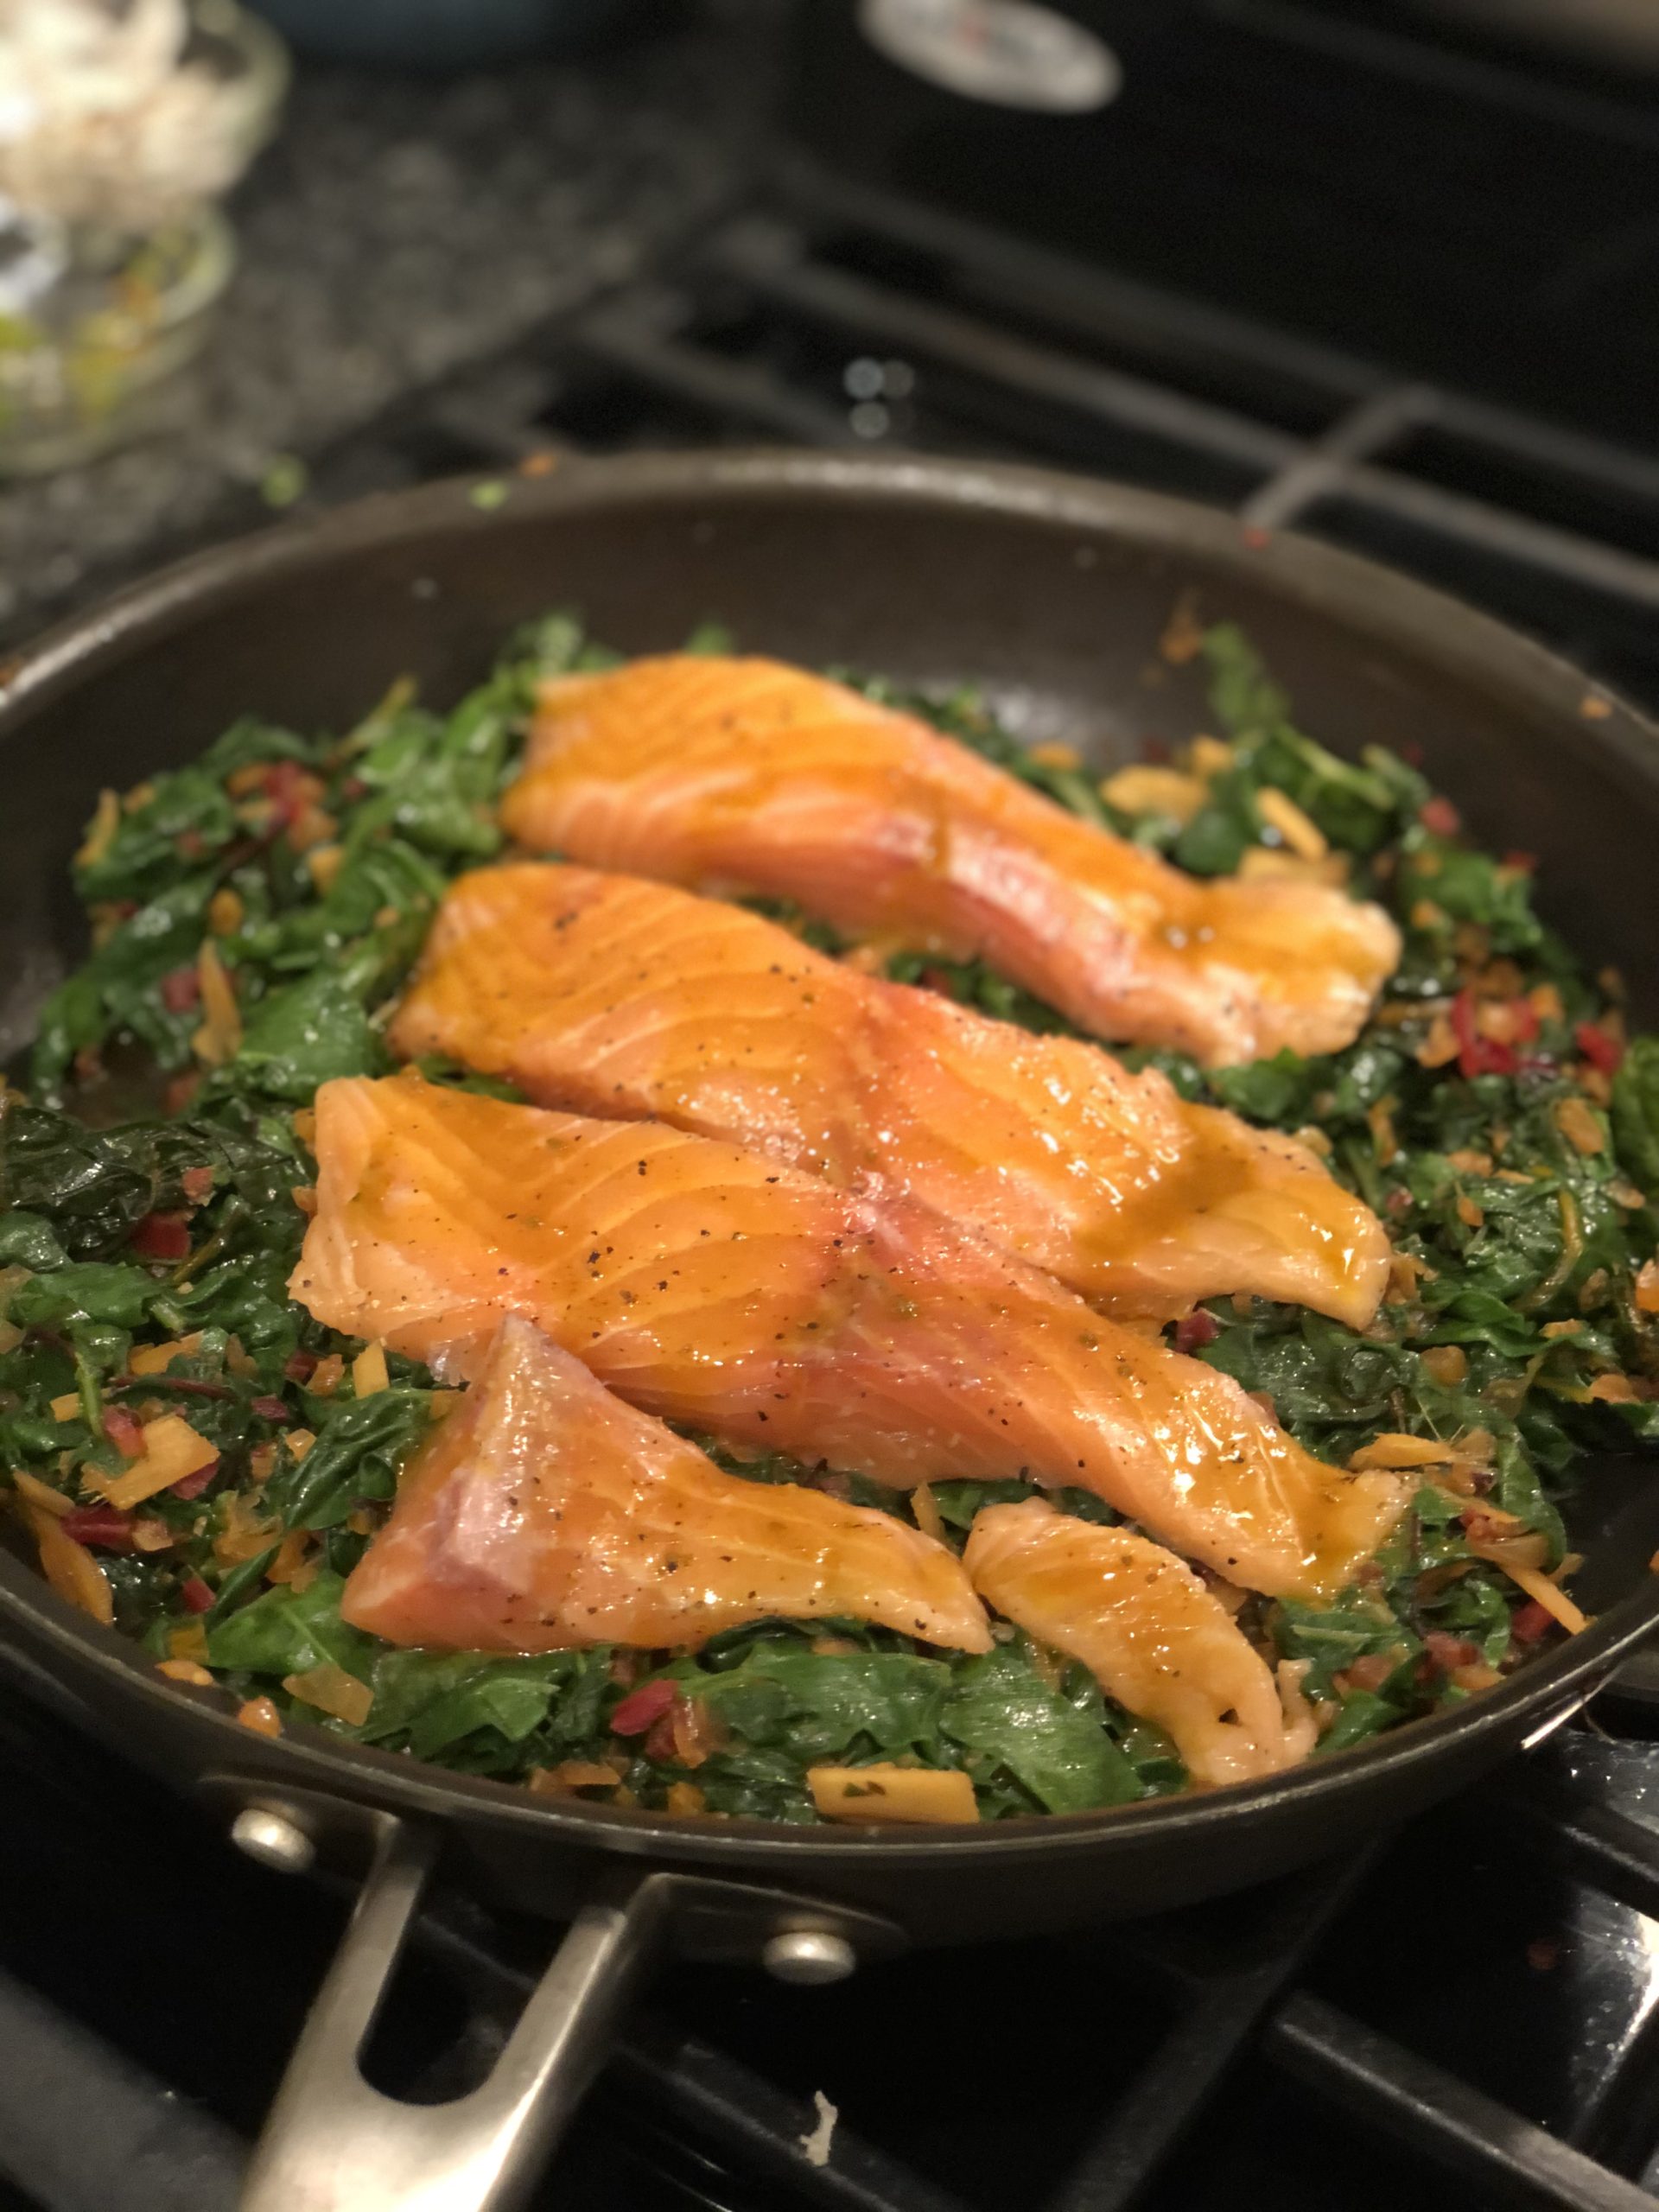
This recipe caught my attention because I’m all about food as medicine, and Turmeric is good for you. I also like salmon and I was intrigued by the coconut crisp. This recipe has all kinds of flavor combinations that are somewhat uncommon – and SO delicious. I got the unsweetened coconut flakes from Trader Joes. Don’t skip this part – this is where the flavor gets interesting.

4. Spicy Chipotle Turkey Burgers – Allrecipes 

I tend to make this recipe more during warmer months, as it’s great on the grill – but I did put it in my air fryer and it was delicious. This seasoning blend with the Chipotle pepper is very flavorful and keeps you wanting another bite. I like to serve this on a pretzel bun with Swiss or Havarti cheese on top. If you are ever making burgers, DEFINITELY add this one to the list.

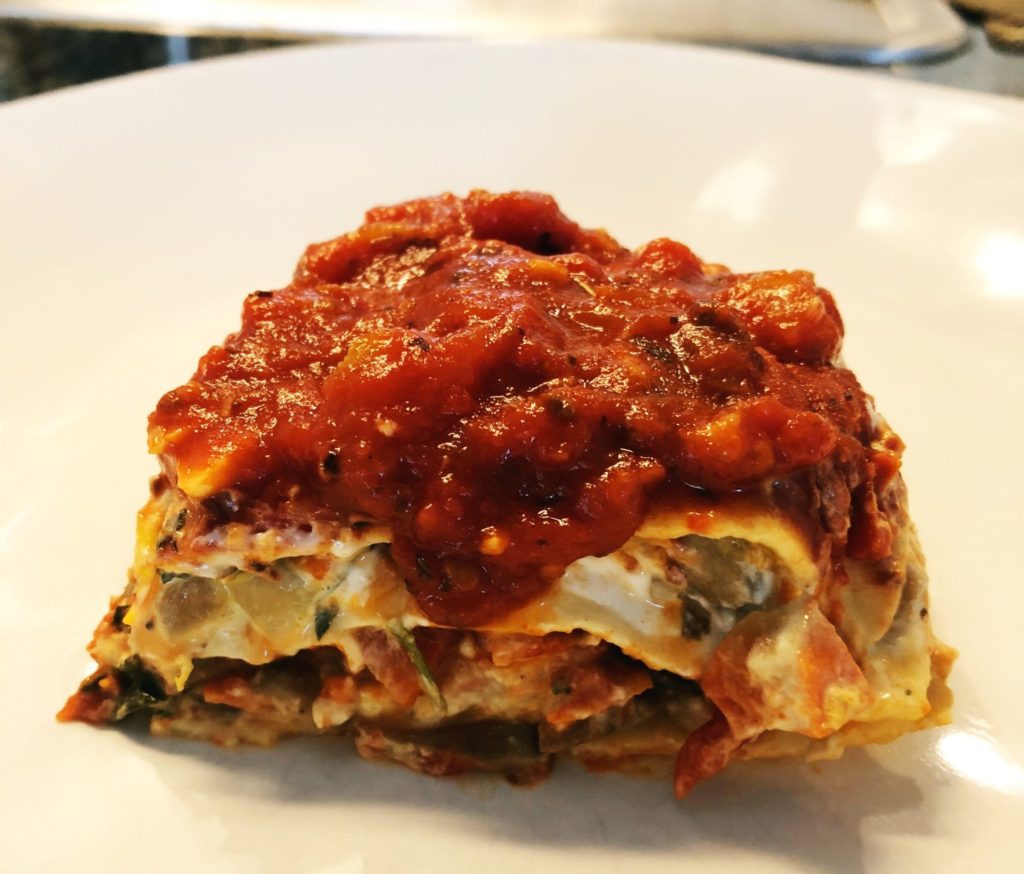
5. Best Vegan Lasagna Recipe – Cookie and Kate

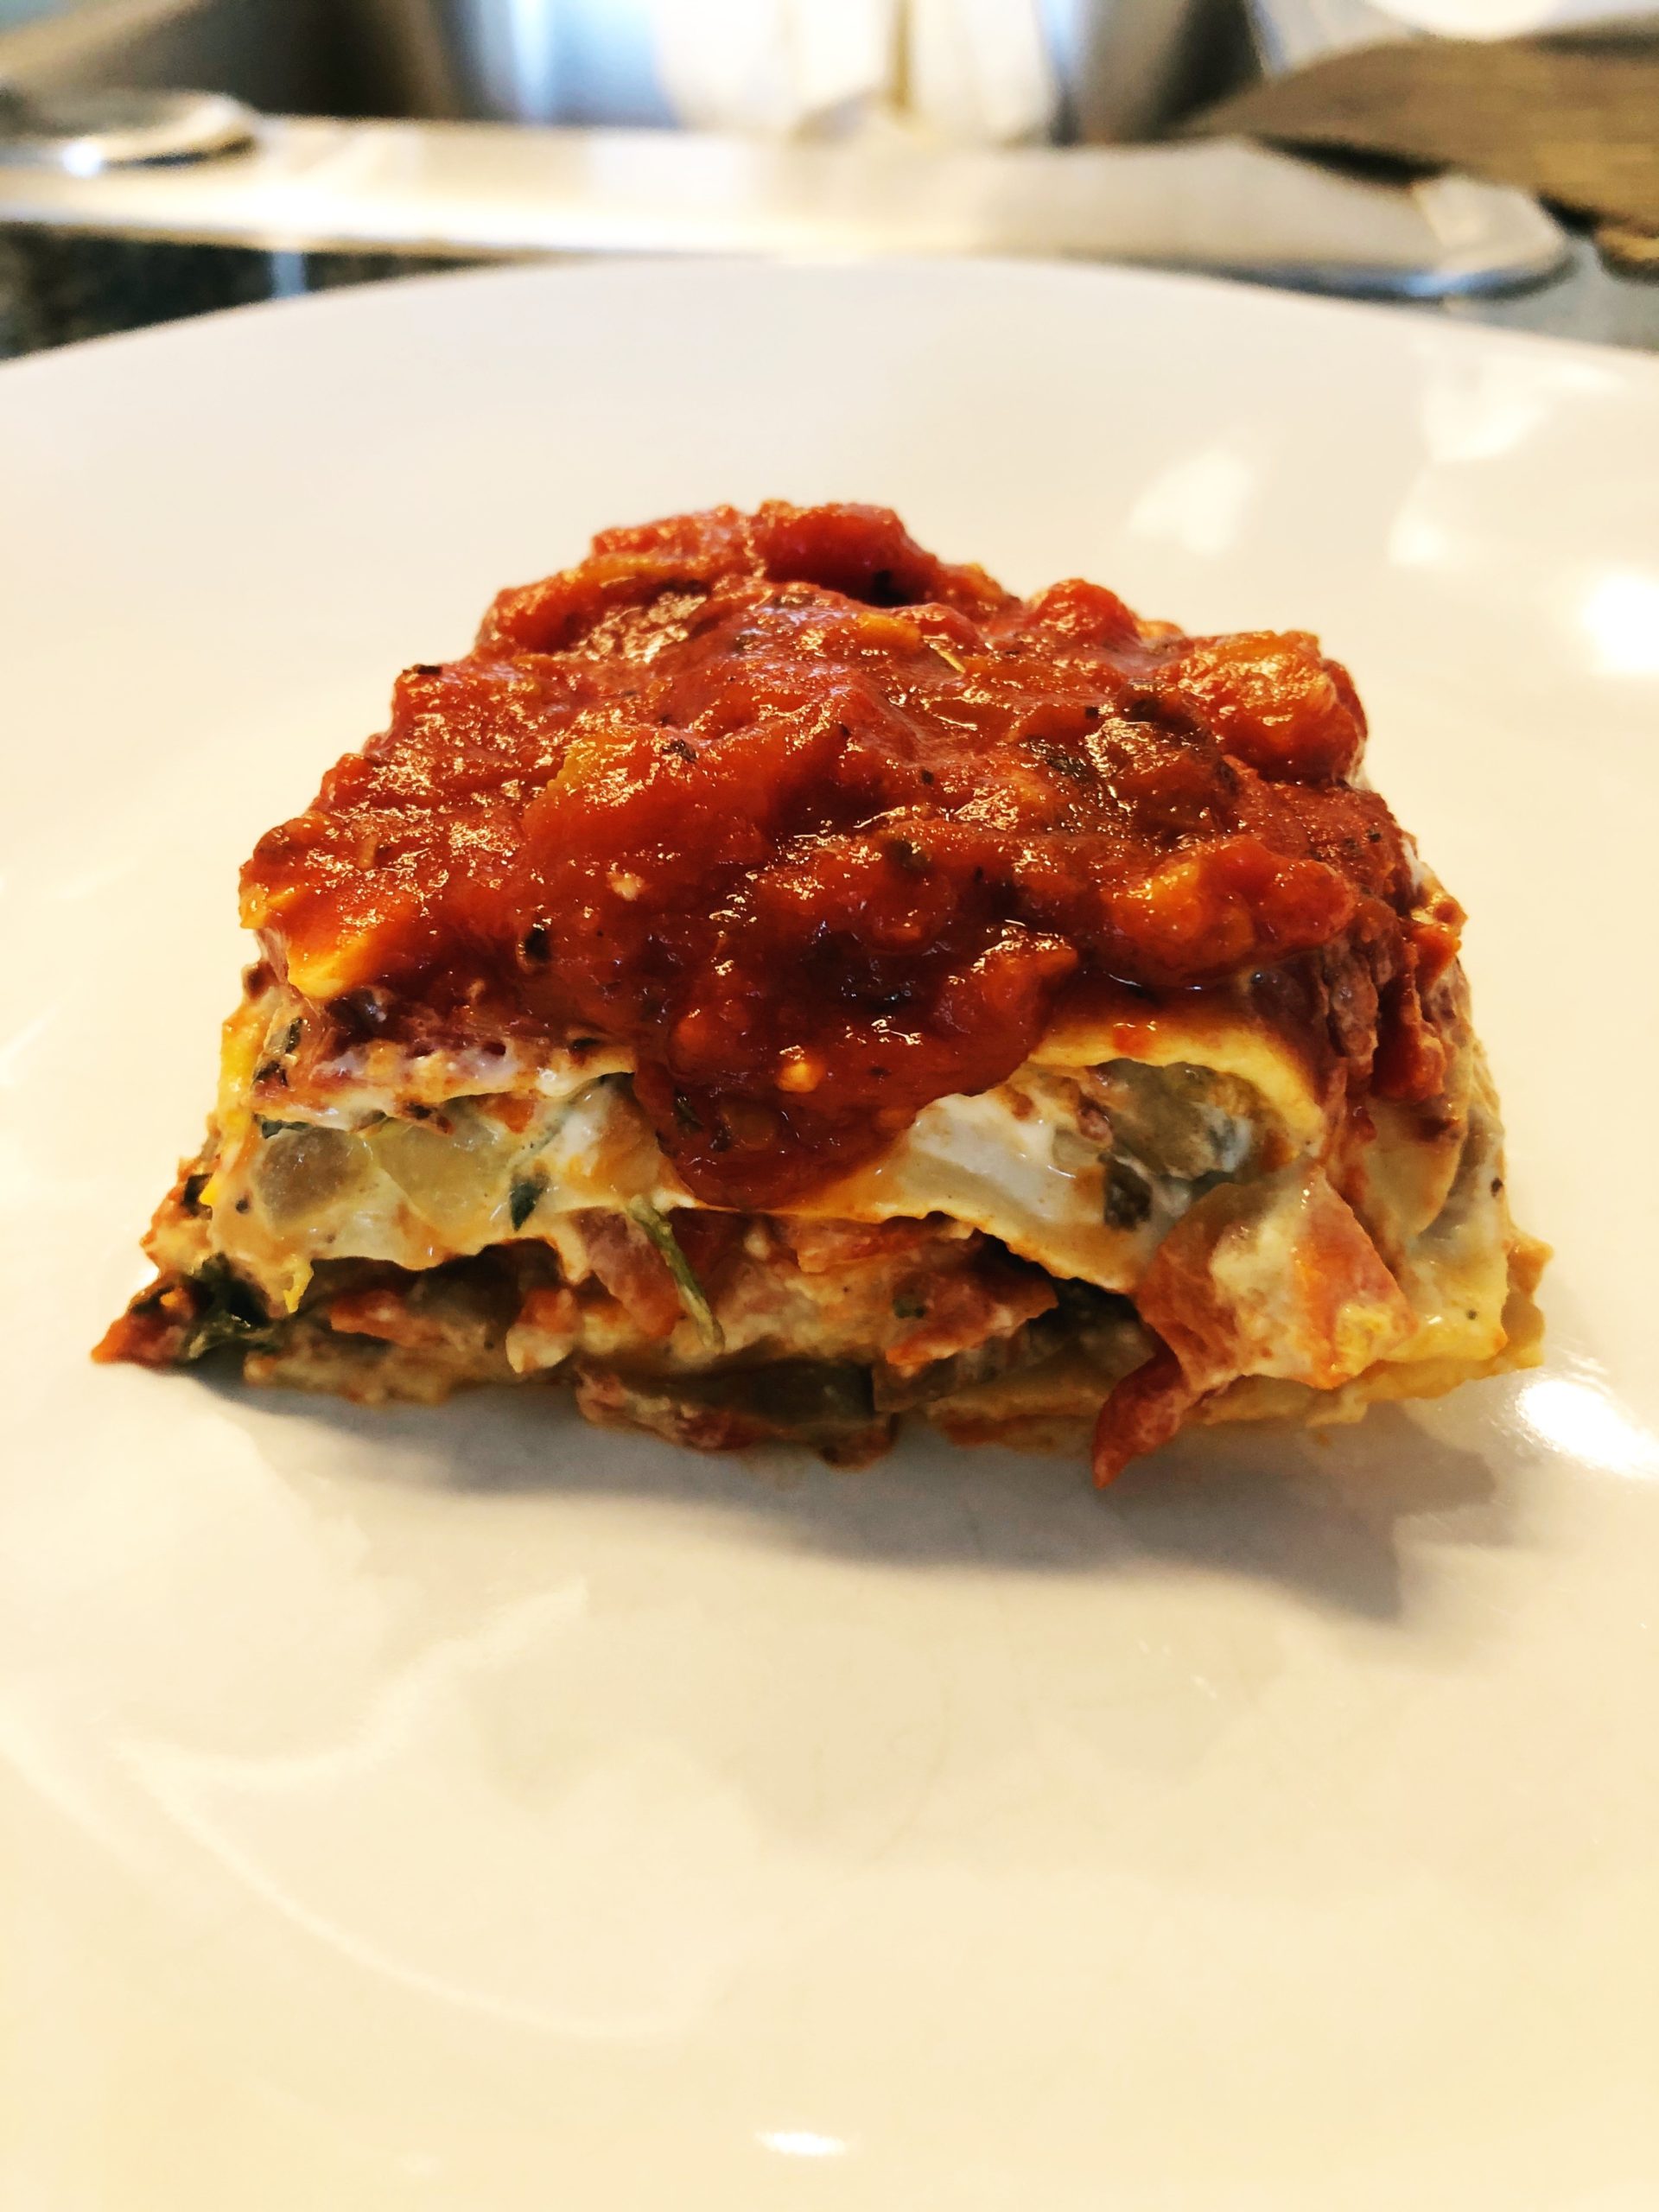
This recipe is a stunner – a guaranteed crowd pleaser for vegans and non-vegans alike. It’s the cashew cream for me. You can eat this as a side item with meat, or as the main course. See my blog post below for more details – I absolutely loved this recipe.

So there you have it – hope that these make your life a little easier and a lot tastier!!

In the meantime, below are a couple of Spotify playlists that I like to play in the background when I’m cooking:

Check them out – I think you may like them!

Lo-Fi Hip Hop Beats: This is chill with a little beat that’s great for the background & won’t distract you from concentrating.

Serotonin Playlist on Spotify – Feel-good music to lift your spirits.

Enjoy! Here’s to good food and good music!

The Vegan Lasagna That Tastes Better Than Regular Lasagna! (No Joke)

Vegan Lasagna with Cashew Cream Sauce

Even though I’m not vegan, I decided to take a chance and try this lasagna because it’s a light, lactose-free option with plenty of vegetables (I try to get my vegetables in my diet every day because eating your vegetables + drinking water are the fountain of youth – but that’s for another post…). Let me tell you. I’m not kidding…this vegan lasagna was better than regular lasagna, and it was all because of the cashew sauce. I PROMISE YOU!

This recipe is so creamy and delicious, and I NEVER would have thought that this would have taste THIS good. I served this dish with roasted chicken and it was the perfect comfort meal for a cold winter evening. The best part was that it didn’t feel like I just ate a brick – I felt light and well-nourished and my taste buds were very happy.

Below is the modified recipe using the Cookie and Kate Best Vegan Lasagna recipe as a base – check out their page for all of the pictures, videos and tips. I’ve also listed the recipe below for your convenience with my notes.

INGREDIENTS:

Sauce:

  • 2 Cans of whole peeled tomatoes (San Marzano if possible)
  • 6 cloves of garlic
  • 2 heaping Tbs pitted black olives (if you don’t like olives, you can’t really taste them – they just add a salty flavor and “umami” to the sauce)
  • 1/2 cup Vidalia onion (diced)
  • 4 Tbs olive oil
  • 2 tsp cayenne pepper
  • 1 Tbs dried marjoram
  • 1 tsp dried rosemary
  • 2 Tbs granulated Sugar
  • 2 Tbs balsamic vinegar
  • Kosher salt to taste
  • Freshly cracked pepper to taste

Cashew Cream:

  • 2 cups raw cashews, soaked for at least 4 hours if you do not have a high-powered blender (If you have a Vitamix or Ninja, you don’t have to soak)
  • 1 cup water
  • 2 tablespoons lemon juice
  • 2 teaspoons apple cider vinegar
  • ¾ teaspoon fine sea salt
  • ½ teaspoon Dijon mustard

Vegetables:

  • 2 tablespoons extra-virgin olive oil
  • 1 medium-to-large yellow onion, chopped
  • 2 large or 3 medium carrots, chopped (about 1 cup)
  • 8 ounces Baby Bella mushrooms, cleaned and chopped
  • ½ teaspoon fine sea salt, to taste
  • Freshly ground black pepper, to taste
  • 5 to 6 ounces baby spinach, roughly chopped
  • 2 cloves garlic, pressed or minced
  • *You can use whatever vegetables you have on-hand – I also added some orange bell pepper.

Everything else:

  • 2 ½ cups marinara sauce, homemade or store-bought (I strongly recommend homemade)
  • 9 no-boil lasagna noodles

INSTRUCTIONS:

Make the Sauce:

Start by making your sauce (you can use canned to save time, but once you make your own sauce, it’s hard to go back) This sauce is from Chef Jason London of Boe Love Personal Chef: (It’s delicious and makes more sauce than you need for the lasagna, and it gives you extra for serving later)

Remove the tomatoes from the can and place in a large bowl. Squeeze the tomatoes with your hands until there are no large chunks remaining. Set aside.

Peel the garlic cloves, dice and set aside. Dice the onion. Give the olives a rough chop.

Pour the olive oil in a saucepan and heat over medium low heat. Once the oil is warm, add the garlic, onion and olives then sweat until the mixture become aromatic. Do not brown the garlic. Maybe 2 -3 minutes.

Pour in the squeezed tomatoes and mix well. Add the dried spices, sugar, and balsamic vinegar. Cover the saucepan partially and simmer until the sauce reduces by about 15% and looks velvety and rich. Add kosher salt and fresh cracked pepper to taste. Set aside.

Preheat the oven to 425 degrees Fahrenheit. If you soaked your cashews, drain and rinse them until the water runs clear.

Make the Cashew Cream:

In a blender, combine the cashews, water, lemon juice, vinegar, salt, and mustard. Blend until the mixture is smooth and creamy, stopping to scrape down the sides as necessary. If you’re having trouble blending the mixture, slowly blend in up to ½ cup additional water, using only as much as necessary. Set aside.

Prepare the Vegetables:

In a large skillet over medium heat, warm the olive oil. Once shimmering, add the onion, carrots, mushrooms, salt and several twists of black pepper. Cook, stirring every couple of minutes, until most of the moisture is gone and the vegetables are tender and turning golden on the edges, about 8 to 10 minutes. Add another splash of olive oil if necessary to prevent them from sticking to the bottom of the pan.

Add a few large handfuls of spinach to the skillet. Cook, stirring frequently, until the spinach has wilted. Repeat with remaining spinach and cook until all of the spinach has wilted, about 3 minutes. Add the garlic and cook until fragrant, stirring constantly, about 30 seconds. Remove the skillet from the heat and season to taste with salt and pepper.

Assemble the Lasagna:

Spread ¾ cup tomato sauce evenly over the bottom of a 9” by 9” baking dish. Layer 3 lasagna noodles on top (snap off their ends to fit, and/or overlap their edges as necessary). Spread 1 cup of the cashew cream evenly over the noodles. Top with half of the veggies. Top with ¾ cup tomato sauce.

Top with 3 more noodles, followed by another 1 cup cashew cream (save the leftover cream). Then add the remaining veggies.

Top with 3 more noodles, then spread ¾ cup tomato sauce over the top to evenly cover the noodles.

Wrap a sheet of parchment paper or aluminum foil around the top of the lasagna, making sure it’s taut so it doesn’t touch the top. Bake, covered, for 25 minutes, then remove the cover, rotate the pan by 180° and continue cooking for about 5 to 10 more minutes, until it’s steaming and lightly bubbling at the corners.

Remove the pan from the oven and let the lasagna cool for 15 to 20 minutes, so it has time to set and cool down to a reasonable temperature. Drizzle leftover cashew cream on top (if it’s too thick to drizzle, thin it out with a small amount of water first).

SO GOOD! Enjoy it – it makes a small pan so if you are feeding more than 2 people, you might want to double the recipe. Bon Appetit!

(Socially-Distanced) Cookout-Approved Tiramisu Banana Pudding Cake – Recipe Review

Hi everyone! 

I have another recipe review for you that I highly recommend. I made the Tiramisu Banana Pudding Cake by Grandbaby Cakes, and it did not disappoint. The creator is Jocelyn Delk Adams, who is a national TV personality and creator behind Grandbabycakes.com where she takes classic recipes from her grandmother and gives them a modern twist. 

Check out my video review below:

This is a classic Banana Pudding recipe with the twist of Tiramisu, where it calls for Ladyfingers as an ingredient. This was my first time working with Ladyfingers, and you can find them in the Italian section of the grocery store. 

The special part about this recipe is the RUM SAUCE! Once I tasted it, I wanted more of it, so when I make this recipe in the future, I would add more sauce to the layers. The ladyfingers definitely make this more of a cake vs. the traditional banana pudding, and I liked the sturdier texture. 

The other update I made was to chop some pecans and sprinkle them on the top of my portion. Not everyone may like pecans, so I didn’t sprinkle it all over the cake, but as a person that loves pecans, I thought that this was a great addition! It adds another layer of texture with the crunch, and of course the flavor is fabulous. 

One modification that I made was that I put mini Nilla Wafers on every-other row for the second layer. I felt like I might miss the Nilla Wafer flavor so I added them in for a little bit of nostalgia – I enjoyed this and would do it again the next time I make it.This recipe is a crowd-pleaser, and since you make it in a 9” x 13” pan, it will feed a lot of people. If you have a big family, this is great, but if not, be sure to have some people in mind to share it with. 

I would absolutely make this recipe again and I highly recommend that you try it this summer. You NEED to go ahead and add this to your summer rotation.  Taste Bud Diaries Approved! Enjoy every bite! 

Since COVID is still out in these streets, I have not been frequenting restaurants as much, so instead I’ve decided to do more recipe reviews until I’m more comfortable with dining out. That said, if you have any other recipes that you would like me to review, let me know and perhaps your will see them featured in the future!

Until next time! 

The Easiest (and most delicious) Homemade Bagels EVER!

I decided to start doing recipe reviews since restaurants are closed for dining in due to COVID. This first review is for the 5-ingredient NO YEAST Everything Bagels that everyone is raving out. For good reason! These bagels are easy to make & absolutely delicious and there is no turning back after you taste them. You need these in your life. I give these 5 stars and two thumbs up. 

I found this recipe on Skinnytaste, and I’ve listed the recipe below for your convenience:

Skinnytaste Easy Bagel Recipe: 

INGREDIENTS

  • 1 cup (5 oz) unbleached all purpose flour, whole wheat or gluten-free mix*
  • 2 teaspoons baking powder, make sure it’s not expired or it won’t rise
  • 3/4 teaspoon kosher salt, use less if using table salt
  • 1 cup non-fat Greek yogurt, not regular yogurt, it will be too sticky
  • 1 egg white, beaten (whole egg works fine too)
  • Optional topping: everything bagel seasoning
INSTRUCTIONS
  • Preheat oven to 375F. Place parchment paper or a silpat on a baking sheet. If using parchment paper, spray with oil to avoid sticking.
  • In a medium bowl combine the flour, baking powder and salt and whisk well. Add the yogurt and mix with a fork or spatula until well combined, it will look like small crumbles.
  • Lightly dust flour on a work surface and remove dough from the bowl, knead the dough a few times until dough is tacky, but not sticky, about 15 turns (it should not leave dough on your hand when you pull away).
  • Divide into 4 equal balls. Roll each ball into 3/4-inch thick ropes and join the ends to form bagels. (or you can make a ball and poke a hole in the center then stretch it slightly)
  • Top with egg wash and sprinkle both sides with seasoning of your choice. Bake on the top rack of the oven for 25 minutes. Let cool at least 15 minutes before cutting.

Also take a look at my video to see how I made them along with my reaction to how they turned out.  

If you make these, let me know how you liked them and be sure to share these with other people! Front line workers are some great people to share these with and you can even make mini-bagels – just cut them into smaller sections. Enjoy!

Brunch Inspiration: Pineapple Upside-Down Cake!

These Pineapple Upside Down Cupcakes are a great brunch recipe and so easy to make! I modified a recipe by Grandbaby Cakes (one of my favorite food blogs) by putting the recipe in muffin cups & used crushed pineapples instead of the rings. I added 1/4 tsp of cinnamon to the batter as well. Fun, tasty & easy recipe! You can eat leftovers with vanilla bean ice cream for dessert or along with your coffee or afternoon tea.

Below is the modified recipe:

Makes about 12 cupcakes

Ingredients:
1 cup all-purpose flour
1 cup granulated sugar
1/4 tsp salt
1/4 tsp cinnamon
1 tsp baking powder
2 tsps pure vanilla extract
3 large eggs
1/4 cup pineapple juice
1/2 cup unsalted butter (1 stick)
3/4 cup light brown sugar
About 1 cup of crushed pineapples (either canned or fresh)
Maraschino cherries

Instructions:
Preheat oven to 350 degrees.
Liberally grease your muffin tin with vegetable oil or cooking spray.

For the cake batter: In a large bowl, whisk together flour, sugar, salt, cinnamon, baking powder, vanilla extract, eggs and pineapple juice until well mixed. Set aside.

Next melt butter over medium heat.
Once melted, whisk in brown sugar and cook for 1 minute.

Put one tablespoon of the brown sugar/butter mixture into each of the muffin cups.

Add about 2 teaspoons of crushed pineapple on top of the brown sugar mixture in each muffin cup. Be sure to spread the pineapple evenly.

Add a maraschino cherry if you so desire (I like to cut the cherries in half instead of using a full cherry. If you use half a cherry, be sure to place it upside down so that it looks nice when you flip the muffins)

Pour cake batter on top of the pineapples/cherry mix.

**Only fill the muffin cups 3/4 full so that it won’t create a “muffin top”. This will make it easier for them to release from the muffin tin after baking.

Bake for about 20 minutes or until toothpick inserted into center comes out clean.

Cool for 10 minutes then invert the muffins onto a cooling rack or serving plate and serve.

*Note – be careful when you are inverting the cupcakes – this can get a little bit messy as some of the cupcakes release faster than others.

Tip- before you invert the cupcakes, run a knife along the ring of each of the cupcakes to help them come out of the tins easier.

Enjoy!!

Easy, Healthy & Delicious – Turmeric Salmon with Coconut Crisp

New Year, New Blog Posts! It’s a new year and I decided to jump back into my blog! I took a little break but I’m going to continue using my blog as a creative outlet. You’ll see me experimenting with some different posts and content. I’m going to keep it simple and share my love of food with you!  My first post of the year features this DELICIOUS recipe.

I made this Turmeric Salmon with Coconut Crisp recipe from Bon Appetit Magazine and it was SO delicious and full of bold flavors. Ginger, turmeric- which is good for you, and I used rainbow chard which I cooked for the first time – tasty. I got the coconut flakes from the bulk section at Whole Foods, and Trader Joes also sells small bags of coconut flakes. I took this picture just before putting it in the oven. Gorgeous!

I HIGHLY recommend it- easy to make and it tastes like something you would eat out at a restaurant. I’m adding this to the rotation.

Here’s the link – If you make this, let me know what you think!

https://www.bonappetit.com/recipe/turmeric-salmon-with-coconut-crisp

Sweet Winter Treats: Homemade Marshmallows and Chocolate Spoons

Season’s Greetings!!

Below are a couple of sweet winter treats that I made over the holidays that I wanted to share:
– The first is a mint marshmallow recipe by Martha Stewart. A lot of people tell me that they didn’t know that they could make marshmallows from scratch – and you can…and they taste WAY better than anything that you have ever purchased on a grocery store shelf. I was inspired to make my own marshmallows after visiting a delicious restaurant called Hot Chocolate in Chicago. They include a homemade marshmallow in their hot chocolate creations, and I decided to give it a try. After one failed attempt at making vanilla bean marshmallows, (they ended up being too rubbery), I came across this delicious and fluffy recipe from Martha Stewart. It’s not hard, but it does require you to pay attention and move quickly. It also helps to get a candy thermometer:

Mint Marshmallows

Below is the link to the recipe:
http://www.marthastewart.com/355781/candy-cane-marshmallows

I served these marshmallows at a party as a part of my hot chocolate bar and they were a hit! I highly recommend that you try them and experiment w/other flavors.

– The next item is extremely easy to make, and can serve as a nice touch for any winter party. These are chocolate spoons, which can be used for stirring into hot chocolate or coffee for an extra chocolate boost. They are incredibly easy to make, and could also be wrapped in cellophane w/a ribbon for a gift. I also included these in my hot chocolate bar. I had both milk chocolate spoons and white chocolate spoons, and drizzled the alternate color on top of each by putting the warm chocolate into a sandwich bag, and cutting a small corner of the bag to drizzle chocolate over the spoons. Very nice presentation, if I must say so myself.

Chocolate Spoons

Below is the recipe:
http://allrecipes.com/recipe/chocolate-spoons/detail.aspx?event8=1&prop24=SR_Title&e11=chocolate%20spoons&e8=Quick%20Search&event10=1&e7=Home%20Page

These are great recipes to add a special touch for any occasion.

Enjoy!

How to Freeze Cookie Dough for Cookies on Demand!

I wanted to post a video about how I freeze cookie dough. I like to freeze the dough for my signature Chocolate Chip and Pecan cookies (I’m going to keep that particular recipe to myself), and other chocolate chip types of cookies (I haven’t tried this on sugar cookies).

The beauty of freezing the dough is that you don’t need to let it thaw out before you bake it. You can put the cold, frozen dough right on the cookie sheet and bake to your heart’s content.

This method is nice because you can make dozens of cookies and then bake them whenever you need them. Sometimes, I’ll cut off only 3 cookies, and make those just for myself.

Hope this is useful to you, especially for the holiday baking season.

Below is a link to a delicious recipe that I will share. Salted Oatmeal Chocolate Chip Cookies. You can freeze this recipe too – I have done it many times:

Salted Oatmeal Chocolate Chip Cookie Recipe

10 Inexpensive and Creative Ways to Sharpen Your Cooking Skills

As Featured On EzineArticles

How are those New Year’s Resolutions going? Some people say that they want to stop eating out so much, then realize that they need to sharpen their cooking skills. The more you cook, the better you get. Here are some creative and inexpensive ways to learn:

1. Host A Cooking Party:

Each One, Teach One- Everyone has cooking strengths. Whether you are more of a cook or a baker, everyone has a signature dish. Use the knowledge from your friends and family by asking a friend/family member to show you and a small group how to make a dish. The different members in each group can rotate “cooking classes”. Maybe you have a friend that knows how to make Indian Food. Have them to teach everyone how to make an Indian dish. The next month, someone else can show off their specialty. There is a great wealth of knowledge in your friendship circles. Use it!

You could also ask a chef at one of your favorite restaurants to teach you and a group of friends how to cook at your house. If you invite 10-15 people and everyone pays about $30, that could cover the cost of the chef’s time and the food ingredients.  Ask the chef to make the class as interactive as possible. This is a great way to get tips on how to make delicious, restaurant quality food.

2. Community Colleges:

Check your local community college for cooking classes. They are often a great value, and you get instruction from people that are trained to cook. In the metro Chicago area (suburbs), College of DuPage offers cooking classes. Downtown, the Chicago Cultural Center also offers cooking classes that are quite affordable, starting at $30 a class (visit www.chicagoworldkitchen.org).

3. Grocery Stores:

Upscale grocery stores often offer cooking classes.  Check your local Whole Foods, Wegmans and Publix stores to see if they offer classes.  Local gourmet stores are also great places to check.

4. Online:

Get cooking tips from the comfort of your own home – there’s no need to go anywhere. Set up your laptop or iPad to watch cooking podcasts and YouTube channels.

  • Cooking-specific podcasts are a great way to learn how to cook. Many of them have a nominal cost, and some of them are free.
    • Subscribe to Podcasts like Start Cooking, which covers cooking basics (you would be surprised at what you don’t know) http://startcooking.com/,
  •  Visit the video section at allrecipes.com for quick, instructional videos on everything from Shortcut Recipes to how to make French Toast.
  • YouTube: Search the videos for the dish that you’ve been wanting to learn how to make. I would suggest that you watch a few videos, and follow the advice of an expert source. I learned how to make sweet plantains by watching YouTube videos, and they were delicious. http://www.youtube.com/watch?v=wCHIeRYzKII

5. Attend Local Festivals

Local festivals often have cooking demonstrations. For example, in Chicago, The Taste of Chicago, Printer’s Row Lit Fest and the Flower and Garden Show all have cooking demonstrations, many times with local celebrity chefs.

6. Specialty Cookware Retail Stores:

Retail stores like Sur La Table and Williams Sonoma offer cooking classes in select locations.  Some classes are offered for free, while others require a fee.  Check their websites for details:

Williams-Sonoma

http://www.williams-sonoma.com/customer-service/store-events.html

Sur La Table – Currently offering a knife skills class:

http://www.surlatable.com/product/CFA-168532/

7. Join a cooking meetup group

Meetup.com is a great website to meet people w/similar interests. Visit the website and search your city for cooking groups.

8. Online Daily Deals:

Daily deal websites like Groupon, YouSwoop and Living Social often offer deals on cooking classes. Scoop them up when you see them.

9. Get a Part-Time Job:

Want to learn how to professionally bake and decorate pastries? Get a part-time job at a bakery. They might be willing to train you. The pay might not be amazing, but it’s an affordable option to learn professional level skills vs. going to a culinary school.

10. Volunteer:

Whether you are volunteering at a soup kitchen, making meals at the Ronald McDonald House, or teaching kids about healthy eating with Common Threads, food-based volunteer organizations are also a great way to learn some cooking skills. As simple as many of the dishes may seem, I’ve always learned at least one cooking tip during my volunteer experiences. It’s great to be able to serve the community and learn all at the same time.

How to Make Homemade Apple-Cinnamon Infused Vodka

I was inspired to create some homemade Christmas presents this year, and decided to make infused vodkas as a gift. I purchased the bottles from the Container Store (no more than $5 each), and used a mid-range vodka (Svedka) which is recommended when infusing – no need to spurge on the Belvedere when adding infused flavor. Once the vodka is finished infusing, remove the fruit, strain, and pour the vodka into the bottle w/a funnel. Decorate the bottle and wrap as a gift!

Check out my video for a demonstration:

Homemade Apple-Cinnamon Infused Vodka

Apple-Cinnamon Infused Vodka Recipe:
– 1/2 liter of vodka
– 3 apples
– 2 cinnamon sticks

I originally was planning on infusing it for 5 days, but it ended up turning into 3 weeks. The vodka was absolutely amazing and full of apple-cinnamon flavor. It was dangerous because you could literally drink it on the rocks. For an apple-cinnamon flavor, I would suggest mixing it with Sprite, Ginger Ale, or Apple Cider (hot or cold). I gave the vodka to my friend Jenny as a hostess gift for her holiday party, and I think she enjoyed it.
At this present moment, I’m infusing a Blueberry-Vanilla vodka as a gift for a party that I’m going to in 2 weeks. Vanilla doesn’t require as much time to infuse, so I removed the vanilla bean after 3 days, and I’ll let the blueberries continue to “marinate”.

Blueberry-Vanilla Infused Vodka Recipe:
– 2 cups of blueberries, sliced
– 1 vanilla bean, sliced down the middle
– 1 liter of vodka

Tips:
– Shake the infused mixture from time-to-time to accelerate the infusing process
– Taste the infused mixture along the way to ensure that it does not taste too strong with the infusing agent. If it does taste too strong, add more vodka to tone down the flavor.

– If you don’t have the time to infuse, you can also present the vodka and the fruit in a bottle, and tell the recipient to open after a certain amount of time.

If you like cocktails, or if you have a friend that does, this is a great gift that can be used year-round.

Cheers!